 Hood Prop Designer
Custom hood props, laid out in minutes.
Put your customer's designs and name on a 6th Gen Camaro hood prop. Where a design hangs off the edge, the prop's cut line grows round it by itself. Send a proof, then export an SVG that LightBurn opens ready to cut.
Free for 7 days with every feature. No key and no card needed: just your email.
Less time drawing, more time cutting
The cut line draws itself
Drag a design past the edge and the prop's outline grows round it, 6 mm clear, with round corners. Live, while you drag.
A proof to send first
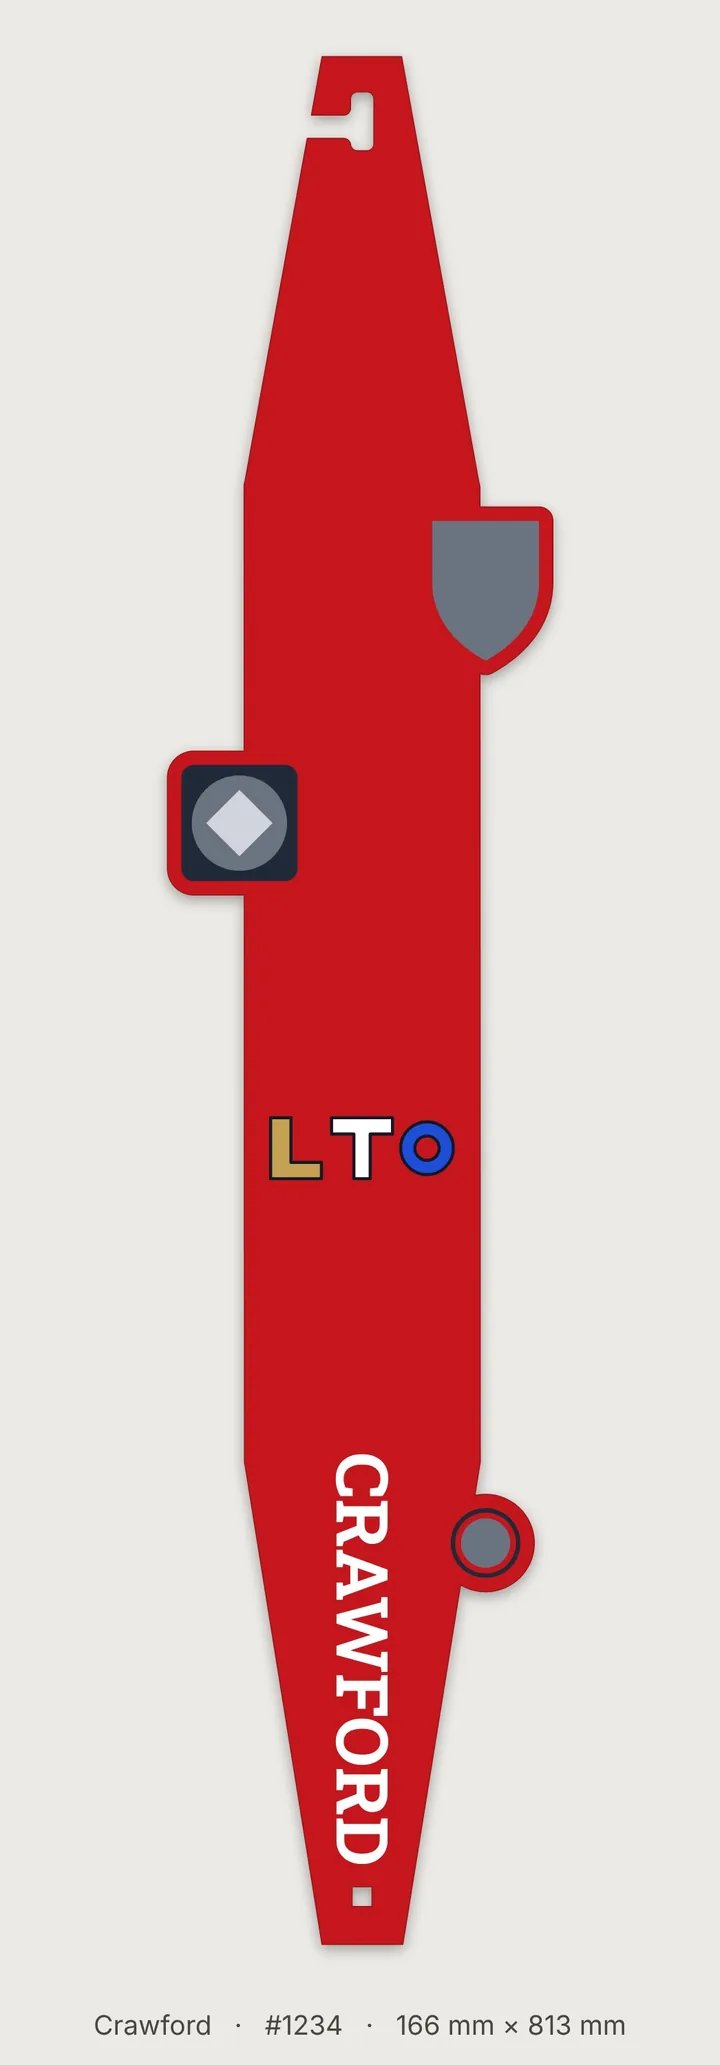
Save a picture of the prop in its acrylic colour, every design in its colours, with the name, order number and size. Text or email it before you cut.
Files that cut true
Real millimetres. The prop's cut line and mounting hole come in on one LightBurn layer, every line of the designs and text on another.
Checks before you cut
A design that isn't joined to the prop, a covered mounting hole, or a design in the way of the hook notch is marked red before you waste a sheet.
Everything a custom hood prop needs
Every picture on this page is from the real app, and the proof and the LightBurn file are files it saved.
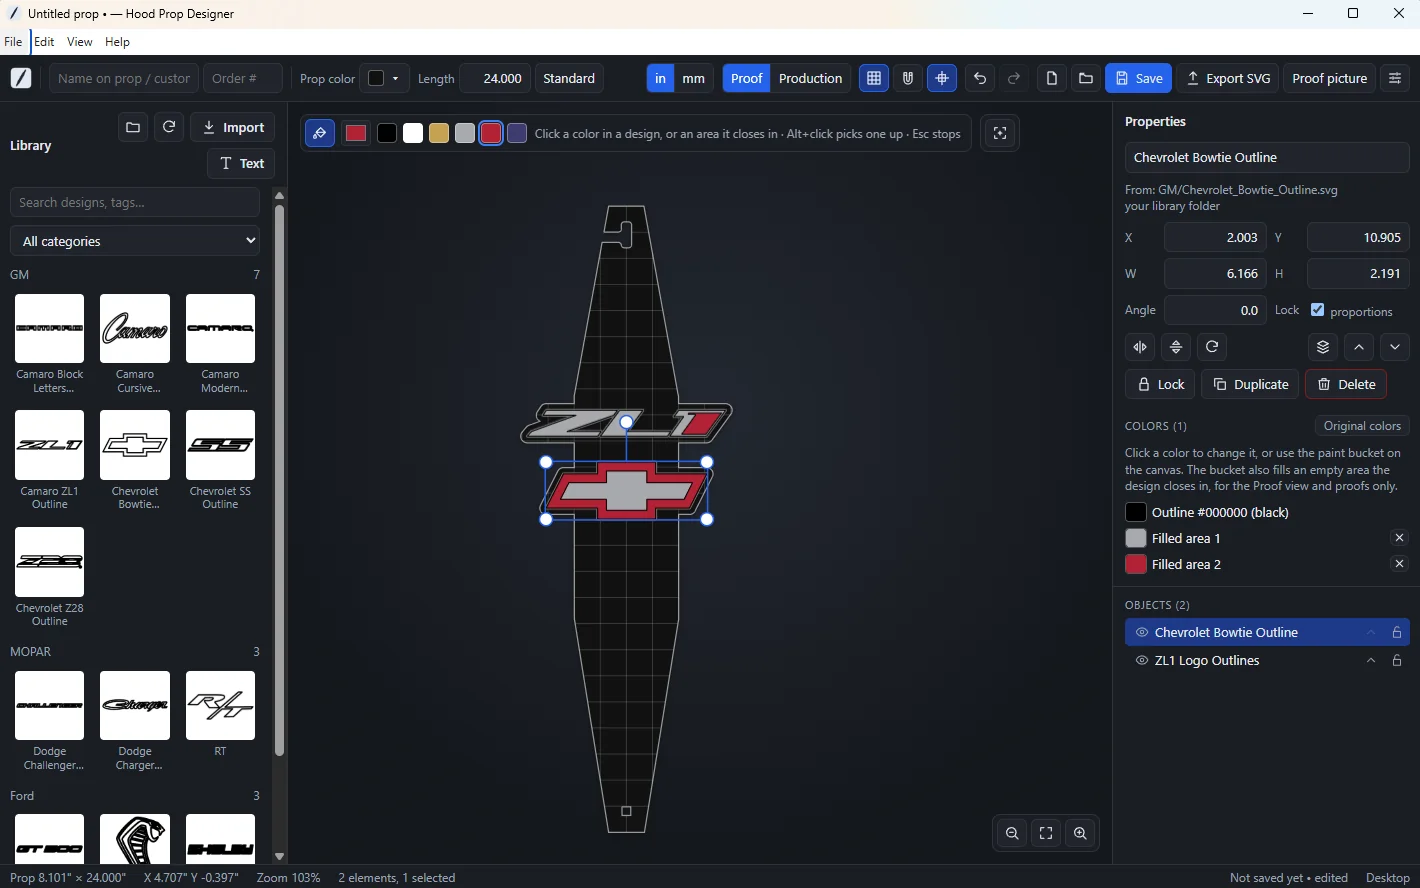
The cut line grows round your designs
Wherever a design sticks out past the edge of the prop, or comes within 6 mm of it, the prop's cut line grows round the design with a 6 mm margin and round corners. Move, resize or turn the design and the outline follows, live.
The prop stays one solid piece with one outer cut line. The hook notch always stays open and the mounting hole is always cut, however close a design comes.
Two parts of a design that nearly meet off the prop leave a narrow slot that could break. Draw a patch over the gap and the cut line runs straight across it; the patch moves with its design.
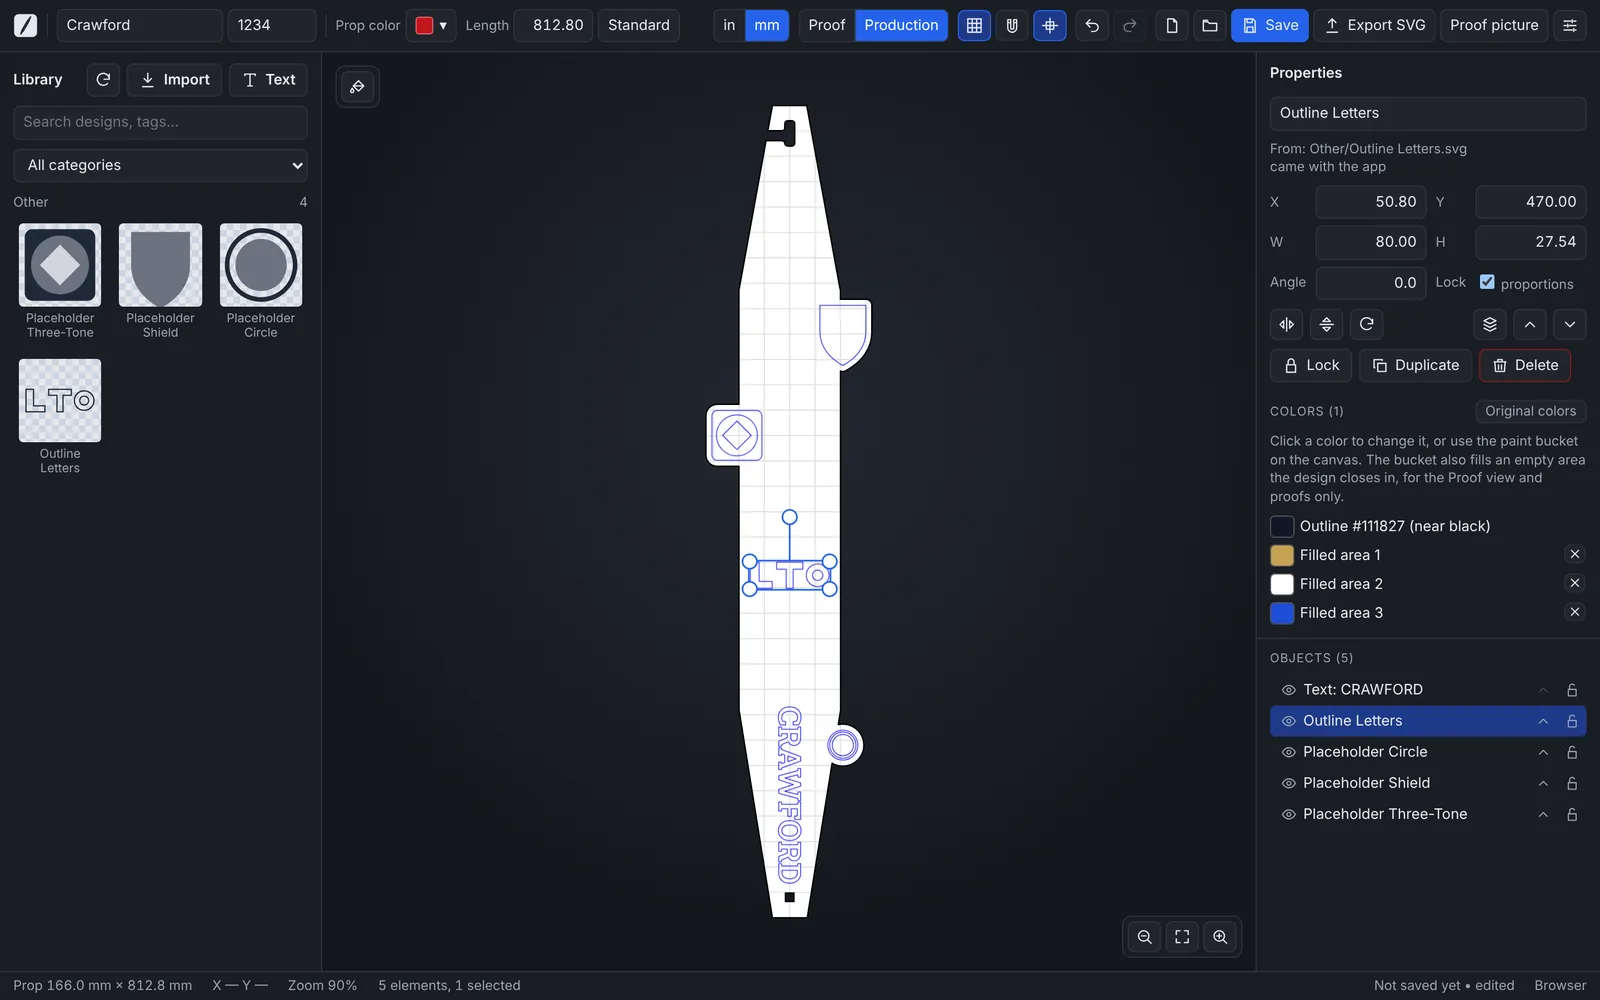
The 6th Gen Camaro hood prop, at its real size
A long acrylic bar with a J-shaped hook notch at the top, which fits over the hood striker, and a square mounting hole near the bottom: 4.006" × 29.946" (101.743 × 760.636 mm) at its standard length.
Type any length from 15.862" to 60". Only the straight middle gets longer or shorter: the hook notch, the tapers and the mounting hole keep their exact size and shape, so the hook still fits. Designs on the lower half move with the bottom end. A prop longer than a 47" laser bed is flagged.
Everything is cut, nothing is engraved
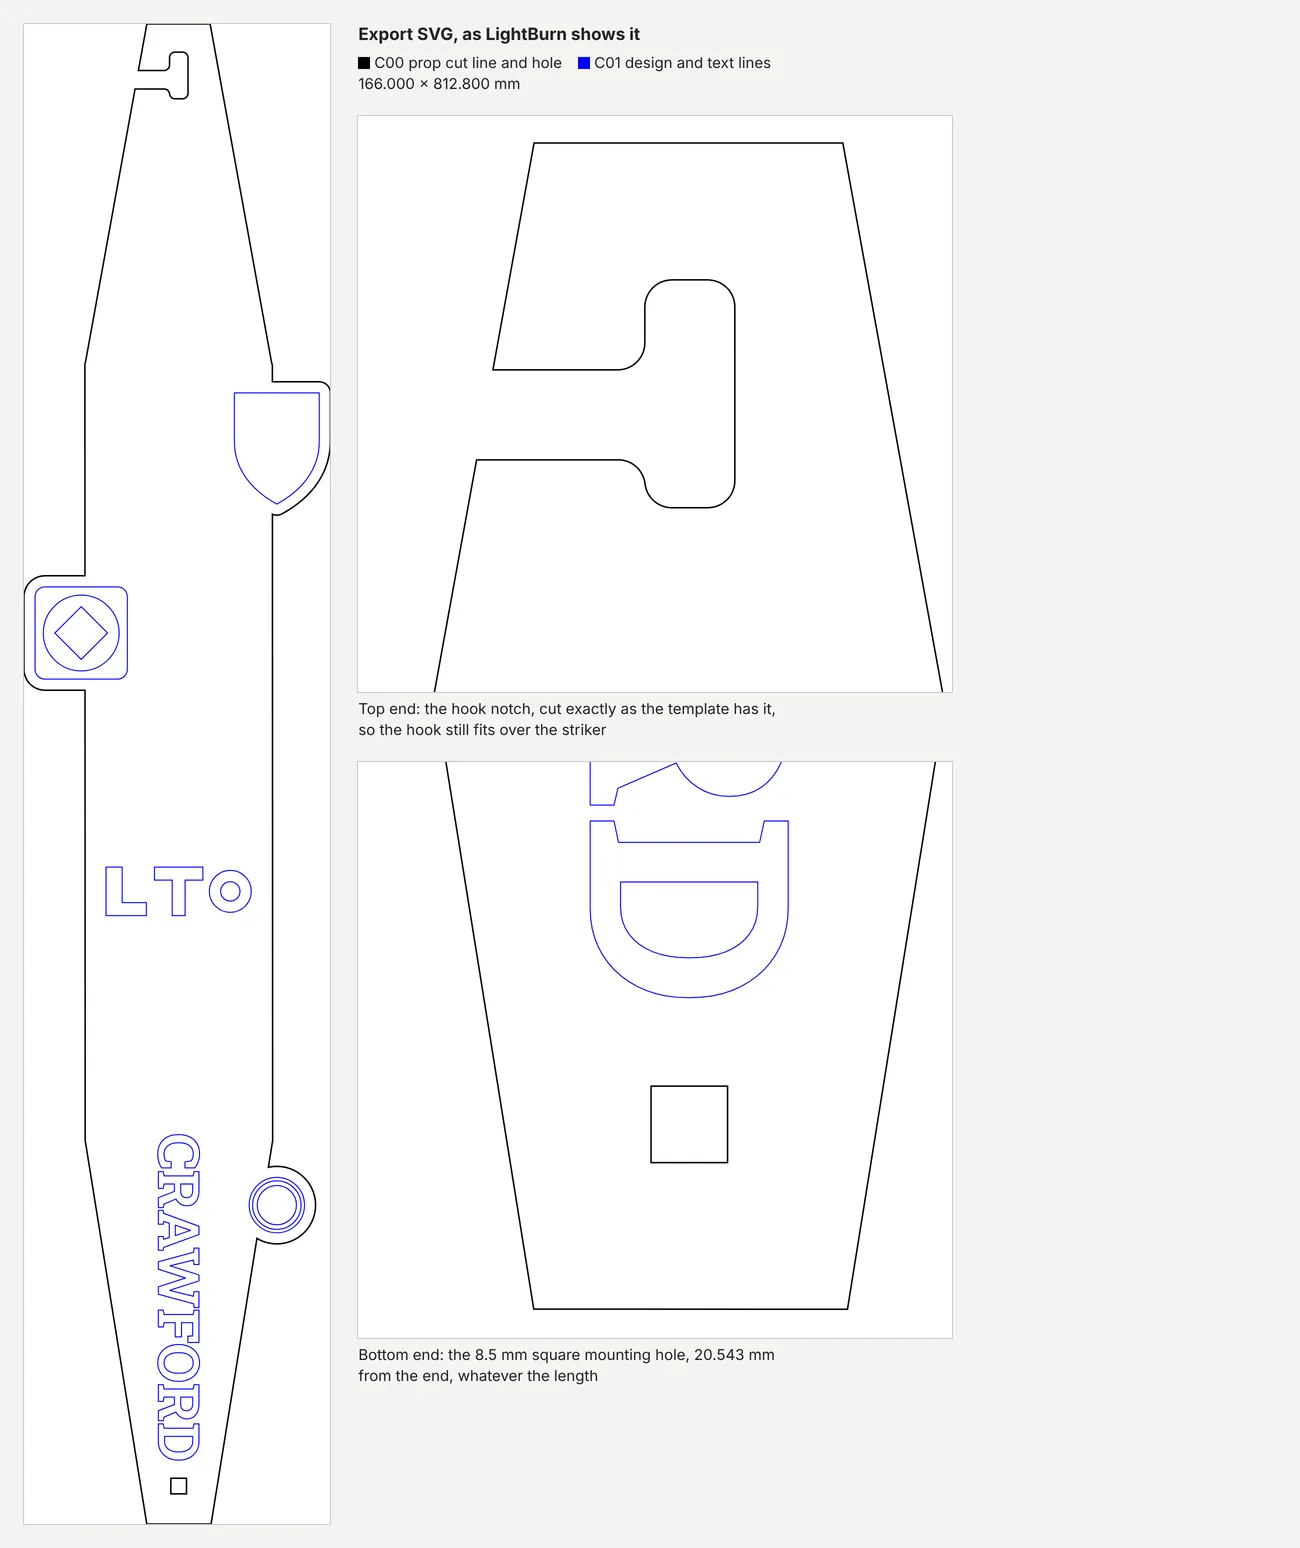
Export SVG writes every line the laser cuts, in real millimetres, each kind on its own colour, and LightBurn turns each colour into a layer:
- C00 black: the prop's cut line, grown round the designs, and the mounting hole.
- C01 blue: every line of every design and the letters of the text.
Set each layer to Line with your speed and power once. How to open it in LightBurn
Proofs in your acrylic colours
Pick the prop colour: black, white, red, blue, yellow, orange, silver, gray or any colour. Every design shows in its own colours, and the paint bucket changes one colour of a design everywhere it is used.
The bucket also fills an empty area a design closes in, such as the inside of outline letters, each with a colour of its own. Fills are for the proof only: nothing is cut for them.
Proof picture saves a JPG of the prop as your customer will see it, standing upright, 3000 pixels tall, with the name, order number and size underneath. Text or email it before you cut.
The shared design library
Designs we publish reach every copy of the app by themselves, marked shared. The app checks for new ones when it starts and every 15 minutes, and keeps them for when you're offline. Missing one? Request a design… from the app.
Your own designs
Your own designs are SVG files in a library folder on your PC, sorted into categories. Import puts a file in the right folder for you. Keep the folder in Google Drive, OneDrive or Dropbox and every PC sees the same designs.
Names in 56 fonts
The Text button adds a name, several lines if you like. Set the letter height as the height of the capitals. You can add your own TrueType or OpenType fonts.
Exact sizes
Drag, or type exact values. Fields take 3/16", 1 1/2 or 12mm. Undo, duplicate, flip, lock and nudge with the arrow keys.
Nothing lost
Unsaved work is kept and comes back when you open the app again. A saved project carries its artwork, so it opens on any PC.
Your layer settings
Choose the LightBurn layer colour, name and order for each kind of line, and the margin round the designs. Save them to a file to move to another PC.
Proof and Production views
Proof shows the prop as the customer will see it. Production shows exactly the lines the laser cuts.
Works offline
After the one-time activation, the app runs without internet. It checks in now and then, and picks up new shared designs when you are online.
Three steps from order to laser
-
Set up the prop
Type the customer's name and order number at the top, pick the prop colour, and the length if it isn't the standard one.
-
Add designs and the name
Drag designs from the library, let the cut line grow round them, and add the name with the Text button. Send a proof picture if you like.
-
Export and cut
Click Export SVG and open the file in LightBurn. Set the two layers' speed and power, and run it.
One price. Yours to keep.
one time
- All future updates included
- Use it on up to 3 PCs
- 7-day free trial first, no key needed
- No subscription and no account
- Key sent by email right after you pay
Secure payment through Stripe. We never see your card number.
Try it on a real order first
Install the app from the Microsoft Store, type your email and start the free trial. For 7 days everything works, including Export SVG and Proof picture.
When the trial ends, your projects stay on your PC: opening, changing and saving them always works. Exports wait for a licence key.
Common questions
Do I need LightBurn?
You need laser software that can open an SVG file. The layer colours are set up for LightBurn, which is what we use in our own shop. LightBurn is sold separately by LightBurn Software.
Does it engrave anything?
No. The laser cuts every line: the prop's outline and mounting hole, and every line of every design and name. There is no fill or image layer.
Does it need the internet?
Only to activate your key once, to check in now and then, and to get new shared designs. Laying out, saving and exporting work offline.
How many computers can I use?
Up to 3 PCs at a time with one key. To move it, deactivate it on the old PC first. How to move a key.
Try it on your next order
Install it free, lay out a real prop and cut it. If it saves you time, buy a key.